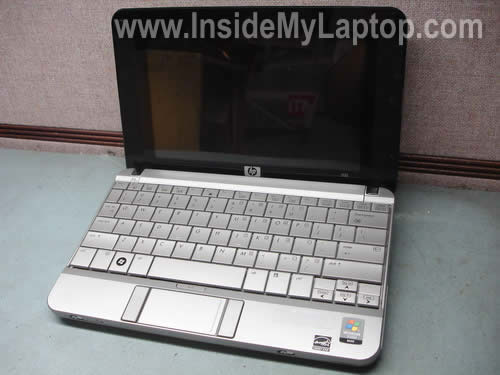
In this guide I explain how to remove keyboard, replace memory module and access hard drive in a HP 2133 Mini-Note PC. Fortunately all these three components can be removed without taking the whole thing apart. Even a novice user can do that if he/she is careful enough.
Also, you should be able this guide for taking apart a HP 2140 Mini-Note PC which has the same body.
Before you start do not forget to turn off the laptop and remove the main battery.
STEP 1.
REMOVING THE KEYBOARD.
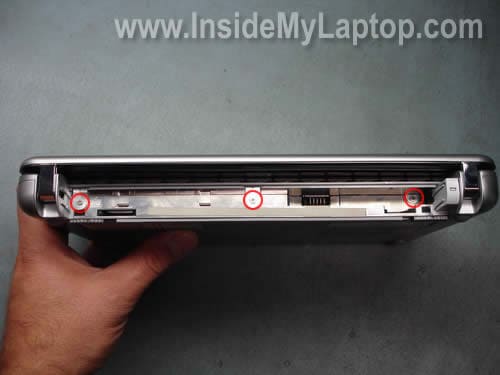
In the battery compartment you’ll find three screws securing the keyboard to the laptop base. Remove these three screws.
Carefully lift up the top side of the keyboard as it shown on the picture below. There are small plastic latches securing the keyboard on both side but they should’t be a problem. Do not lift up the keyboard too much, it’s still connected to the motherboard.
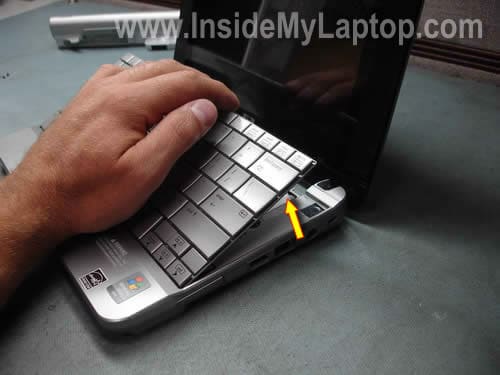
Set the keyboard so you can access the cable connector underneath. You’ll have to unlock the connector before you can release the cable and remove the keyboard.
WARNING! Be very careful with the connector. You cannot replace the connector if you accidentally break it. The connector is permanently attached to the motherboard. If it’s broken, the whole motherboard has to be replaced.
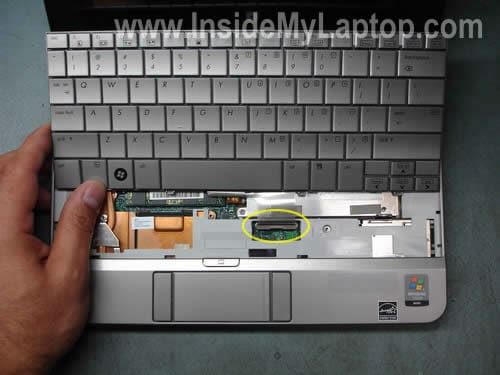
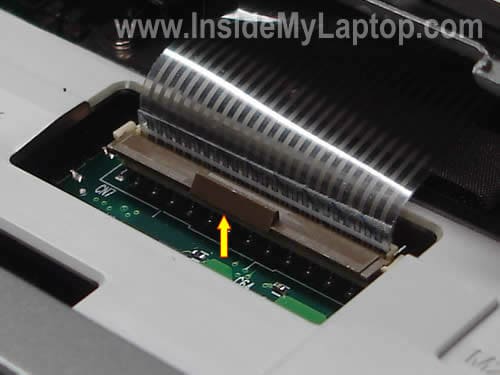
In order to unlock the connector, lift up the brown locking clip. The clip will open as a door on hinges.
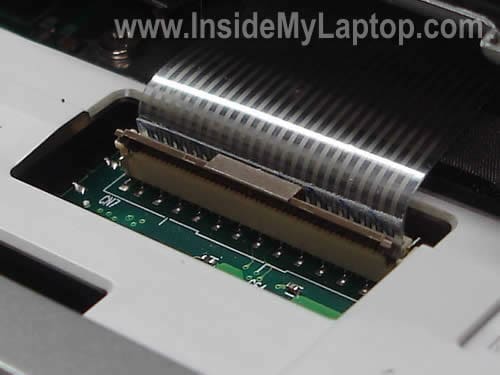
On the picture below you see the same connector in the unlocked state.
Now you can release the cable and remove the keyboard.
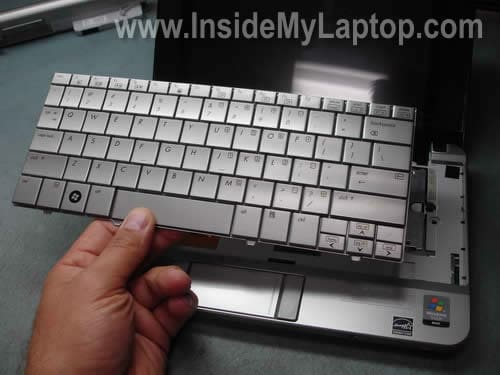
Here’s the back side of the keyboard removed from a HP 2133 Mini-Note PC.
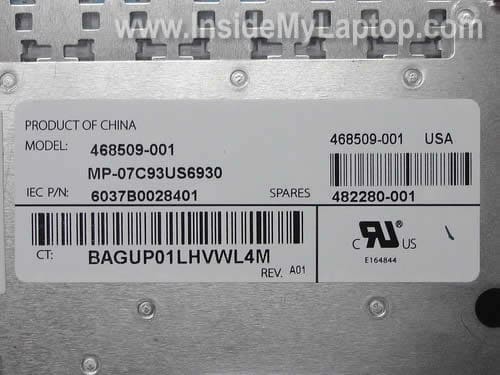
You can find a new replacement keyboard if you search by the part number 482280-001. The keyboard is not expensive and can be purchased for less than $25. Searches by the keyboard model number 468509-001 also will bring you some results.
STEP 2.
REMOVING THE MEMORY MODULE.
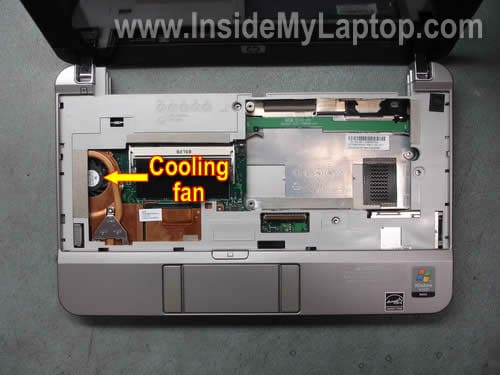
HP 2133 Mini-Note PC has only one memory slot and it’s located under the keyboard. After the keyboard is removed, you’ll find the memory module between the cooling fan and hard drive.
In order to remove the memory module, carefully spread latches on both sides of the slot.
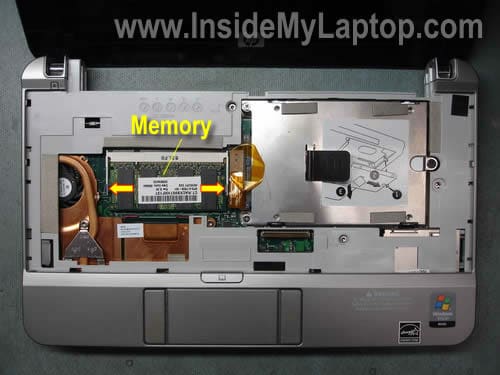
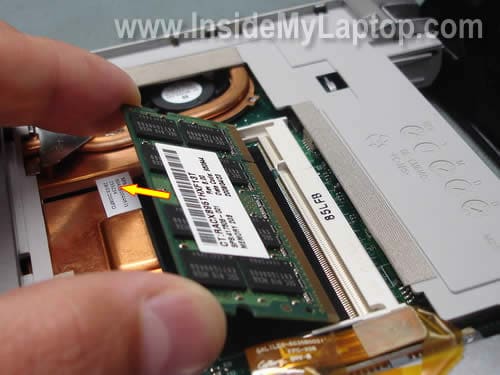
The memory module will pop up at a 20-30 degree angle and you can pull it from the slot by the edges.
HP 2133 Mini-Note PC will take up to 2GB memory module. You should use DDR2 PC2-5300 or faster DDR2 SODIMM module.
STEP 3.
REMOVING THE HARD DRIVE.
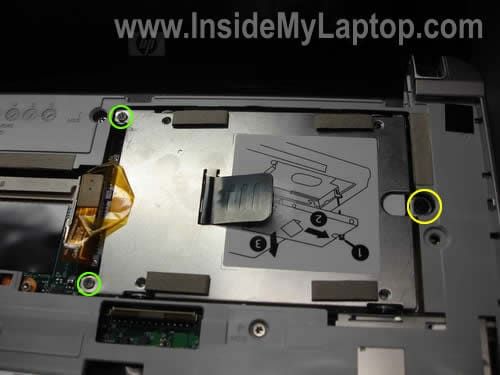
Remove two screws (green) and loosen one screw (yellow) securing the hard drive assembly.
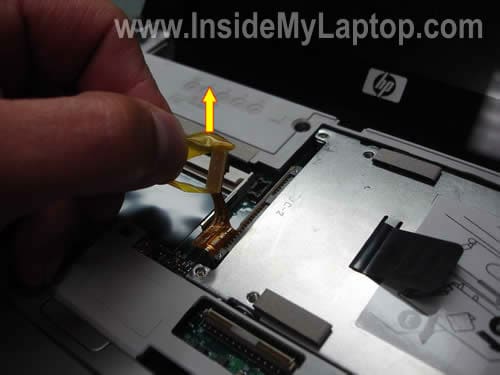
Pull the hard drive cable up and disconnect it from the motherboard.
Remove the hard drive assembly from the laptop.
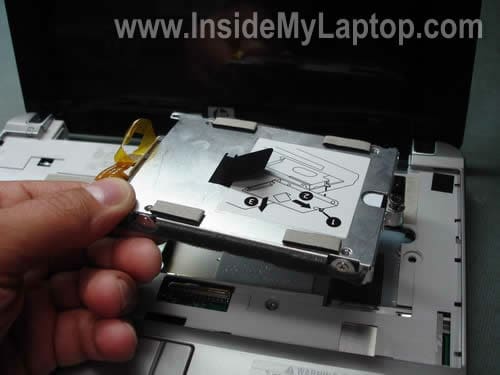
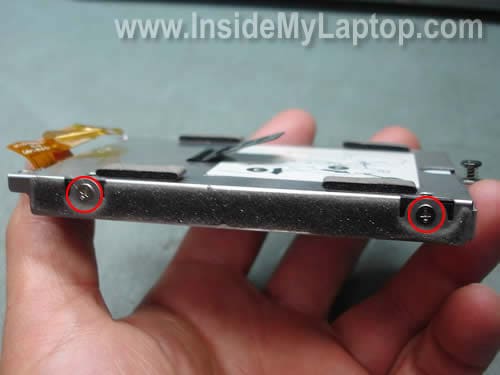
Remove two screws from each side of the hard drive assembly. These screws securing the hard drive to the caddy.
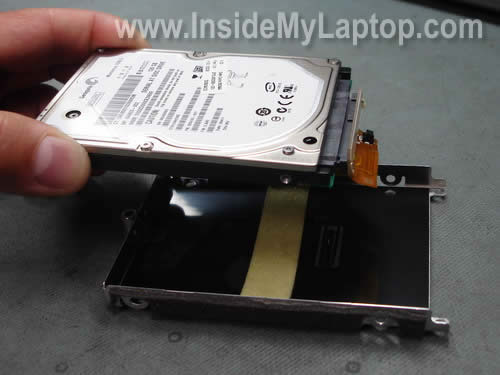
Remove the hard drive from the caddy.
Disconnect the hard drive connector.
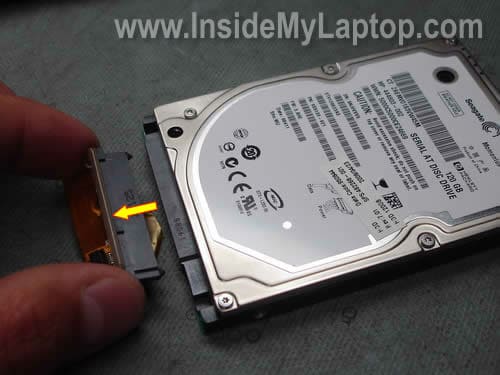
Now you can replace the hard drive with a new one. In my laptop I had a 120GB 7200RPM hard drive installed. You can replace it with a larger drive without any problem. Make sure then new drive also works at 7200RPMs. You can find a brand new 320GB 7200RPM hard drive here for less than &70.
CLEANING THE COOLING FAN.
If your laptop overheats, most likely it happens because the cooling module got clogged with dust.
When you remove the keyboard you can get a limited access to the cooling fan. It would be enough for cleaning the fan and heat sink.
For cleaning the fan use a can of compressed air of find an air compressor. Spray compressed air into the fan until all dust is gone.
Block the fan with your finger so it doesn’t spin when you spray air inside the cooling module. Hi RPMs can kill the fan bearing.
You’ll find complete laptop disassembly instructions in the official service manual for HP 2133 Mini-Note PC and HP 2140 Mini-Note PC.
Credits to inside My laptop